Last week for my Learning Project I painted along to a Bob Ross painting video and I recorded myself painting too! I used my camera (Nikon D5100) to record myself, well, for most of the video. My camera battery ended up dying about half way through painting (I totally forgot to charge it before hand) so I used my cell phone, Samsung Galaxy S9, to finish recording! I am super happy that I had a Popsocket on the back of my phone because I was able to stand my phone up to record it! After I had the videos recorded, my next step was to figure out how to use iMovie. I had no issues at all uploading the video off of my camera’s SD card to my Macbook Pro. The problem came when I needed to get my video off of my SAMSUNG phone onto my APPLE laptop. After a few choice words, I finally figured out what I could do. Google Drive! Take that Apple! So I uploaded the video from my phone to my Google Drive that I could access on my laptop. However, this took over a day to upload (screw you rural wi-fi) but when it did upload I was able to move it over into my iMovie media!
Now it was time for the real fun to begin. I have only used iMovie once before in my second year of university (2 years ago) and it’s had a few updates since then and I also completely forgot how to use it. SO it was a whole new learning process for me!!
I’m not one for following written instructions, never have been. I’d much rather dive in head first and problem solve on my own. So with that said, I dove right on into iMovie. When you first open up iMovie, this is what it looks like for the most part (ignore my videos, this screen was empty before I made my videos):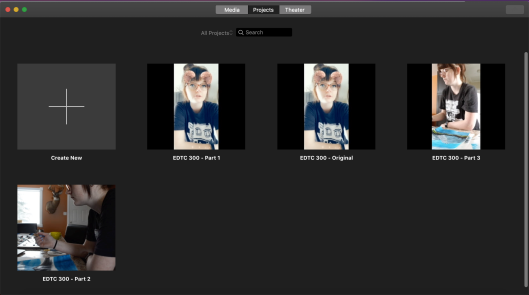 To create a new video, you have to click the square that has the + sign, and these are the options it give you:
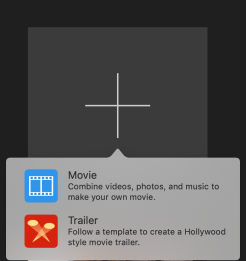
I chose the Movie option because I know I didn’t want to make a trailer, so the Movie option was most likely my best. After you’ve clicked on the movie option, this is the screen you get: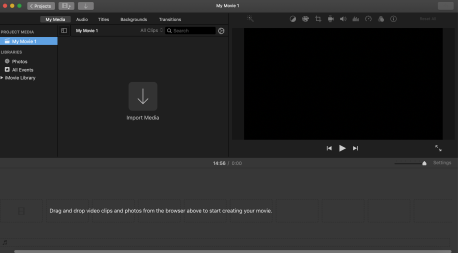
I was definitely a bit intimidated when I first saw that screen. But I pulled up my socks and got right to work. I went to my Google Drive and saved my video that I had recorded on my phone and then dragged it over to the ‘Import Media’ area on the iMovie screen. Then I went to my SD card file and imported those video files. I messed up a few times while recording so I had a few different videos on my camera’s SD card that needed to be merged into one along with my cell-phone video.
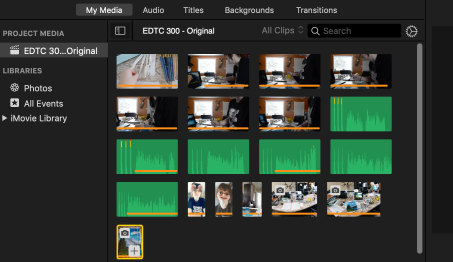
This is what my media library looked like with everything uploaded and imported into it. The green rectangles are audio clips that I recorder with the audio recording option on iMovie. I used these to add in some voice overs for some parts where I messed up (like at the beginning I was painted on the wrong side of the paper) and also where a swear or two might have slipped out (hey, I’m not perfect!). My next step was to organize and combine all the audio and video clips to make one cohesive video. I had to drag and drop the clips from the above image into the area right below it (below image), in my own desired order.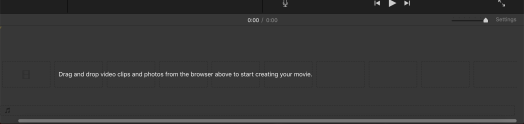
This seemed too easy…but hey it was working! Once I had all my video and audio clips in the order I wanted, I looked at the length of whole video…. it was a total of 1:08:38 WHAT!?! Okay, now is when I knew I had to find a way to speed parts (or most) of the video up so it would be a much more reasonable length. So I started looking around on iMovie for something that reasonable speed. To be honest, I really had no idea what I was looking for and I just started clicking different things BUT I just so happened to find out how to adjust the speed!! The red circle shows what you have to click in order to adjust the speed. It gives options for slower, normal, fast, freeze frame and custom.
I was then able to select the clips that I wanted sped up and the ones that I also wanted to leave at a normal speed so the viewer could still understand what I was saying. There is also the option to Preserve Pitch when speeding up or slowing down clips. I used this for certain parts throughout my video so I wouldn’t sound like a chipmunk running on only espresso shots for the entire video.
My video was coming along nicely at this point. After speeding things up and omitting so selected parts from videos (you just have to click and drag on the video and then hit delete), I was down to 37:09…WOOHOO. Okay, so my video was done. Now I needed to upload my video to YouTube. I right clicked my video and then clicked Share Project and then clicked YouTube.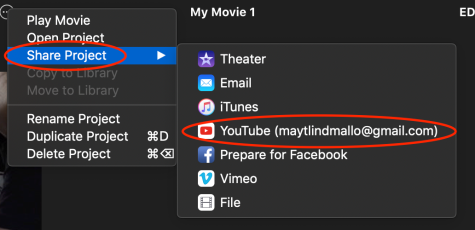 I was then greeted by this lovely warning message:
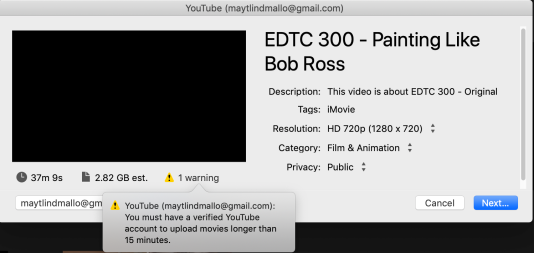 So after all my hard work of reducing the time of my video IT WAS STILL TOO LONG. Are you kidding me?!
So I went back to my video and cut and paste my video into three sections. I made Part 1 14:58 minutes, Part 2 was 11:36 and Part 3 was 10:38. So then I was FINALLY able to upload my videos to YouTube.
You know the sound that a plane makes when it’s taking off? Well that’s what my laptop sounded like trying to upload those damn videos.
Well, this sums up my experience recording a video of myself painting along to Bob Ross’ Distant Mountains and using iMovie for my Learning Project. It was quite a learning process, but it was fun to teach myself how to use a new program!

Hey Maytlind!
It sounds like you had quite the frustrating experience with this video project! First of all, I think that it’s great that you’re exploring different video editing tools! EDTC 300 was also my first experience with iMovie and I honestly had no clue what I was doing! I agree that it is actually a very easy tool to use and it really allows for you to put together a nice clean video! Secondly, I had no idea that you had to have a verified account to upload videos that were longer than 15 minutes…I guess I haven’t ever actually tried uploading one longer than that before so it’s good to know for the future! It sounds like you did a great job when it came to problem solving, which is great to see! I loved how you didn’t give up on it and were ultimately able to upload a great in-depth video that outlined your painting experience! Again, great work!
Lauren
LikeLike